To begin the billing process, select the desired billing profile from the Settings drop-down menu. Confirm that the billing date range reflects the correct range (which will adhere to the default of the profile unless manually changed). If any changes are made, the list will automatically reload the billable matters.
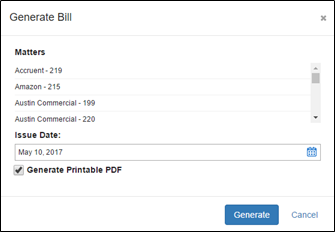 |
If the list matches the matters that you want to bill, click the Select All checkbox then the blue Generate Bills button. Not all bills must be run. Users can select multiple (multi-select rules apply) or select a single item to generate a bill for. The top portion of the resulting dialogue lists the matters that will receive bills. Set the Issue Date to the date that will show on the printed bill. If you would like to automatically generate a printable PDF of the pre-bills, click the appropriate checkbox then Generate. |
Note: Issue date is used by many reports to provide billed totals for a given date range.
The dialogue will provide a progress percentage as it generates the pre-bill records and PDFs. Once this is complete, the generation process is complete. If the Generate Printable PDF checkbox was checked, a dialogue to download the PDF will pop-up. Some browsers block this pop-up the first time, so you may need to turn off the pop-up blocker for Centerbase, then grab the PDF from the Bills page.
If you have other profiles (i.e. other attorney groupings or if you generate bills separate from statements) then you may proceed with generating those bills. It is recommended that billing profiles be distinct whereas you are filtering on a unique field on the matter that can only hold on value. This will help prevent double bill generation when using the statements. For example, many clients have separate profiles filtered by Responsible attorney or Billing Type (i.e. Hourly, Contingency, Flat Fee, etc.).
Comments
0 comments
Please sign in to leave a comment.