
Billable Events are Centerbase Items that are created by the Centerbase Mobile App Automated Time Capture feature. To view these Billable Events and convert them into Time Entries on the Web, you can use the Billable Events Dashboard.
Setup
To access the Billable Events Dashboard, make sure you have first made a Navigation Bar item for the Billable Events Dashboard in the System Settings -> Navigation Bar settings.
Page Overview
On the Billable Events Dashboard, you can view Billable Events and information about them in a table. Additionally, metrics about time and projected amounts for these Billable Events will be displayed in panels near the top of the page.

- To Change the filters for what Billable Events will be displayed, use the filters near the top of the page (Timekeeper, Billable Event Type, Matter, Contact, Billing Status, Date Range), and click the Filter button to apply the selected filters.
- To change the sort order of the table, click on one of the columns to alternate between sorting by that column in ascending or descending order. Note that not all columns can be sorted by.
- To further narrow down the displayed Billable Events, use the Search field. This will search any of the columns for values that match the provided search term
- To navigate through pages of Billable Events in the table, you can use the page controls beneath the table.

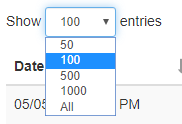
You can also change the number of billable events that will be displayed on each page of the table using the drop-down above the table.
Turning a Billable Event into a Billing Entry
To create a Time Entry from a Billable Event, look in the Time Entry column for that Billable Event. If there is no existing Time Entry for this Billable Event, there will be two options: “Edit and Add”, or “Add”.

- “Add” will automatically create a Time Entry from that Billable Event using the information for that Billable Event to fill in: Date, Matter, Timekeeper, Description, and hours. The time entry will have the default values for Rate and Billing Codes.
- If your firm requires you to manually enter the billing code(s) then you will have to use the "Edit and Add" option to input the billing code(s).
- “Edit and Add” will open the Time Entry dialog with the default information already populated. From here, you can make changes and save the Time Entry. Note that the Time Entry will only be created if you click “Save” on this dialog.
- To edit an existing time Entry for a Billable Event, look in the Time Entry column for that Billable Event for the “View” button.

- Clicking this “View” button will open up that Time Entry, allowing you to edit the Time Entry.
Comments
0 comments
Please sign in to leave a comment.