
Table of Contents
Timekeeping
Timekeeping can be managed right from the Centerbase app. Entries can be viewed, added, edited, and/or deleted, whether they were added from the app or the web.
View:
On the Time Entry page, a calendar can be viewed in month, two week, or week formats. There is also an orange button on the top right that will take the user to today's date and entries. Any date with a time entry on it will display a dot underneath it. Select a date to see the time entries on that date display below the calendar. Each will show the matter, hours, and the beginning of the description. Pressing on the entry to open and edit. If looking at the current date, there will also be a Play icon that will allow the user to start a timer for that entry. If an active timer is running, a pause icon will show on that entry. The timer is the same timer as the web, so if started on the app, it can be ended on the web and vise-versa.

Add:
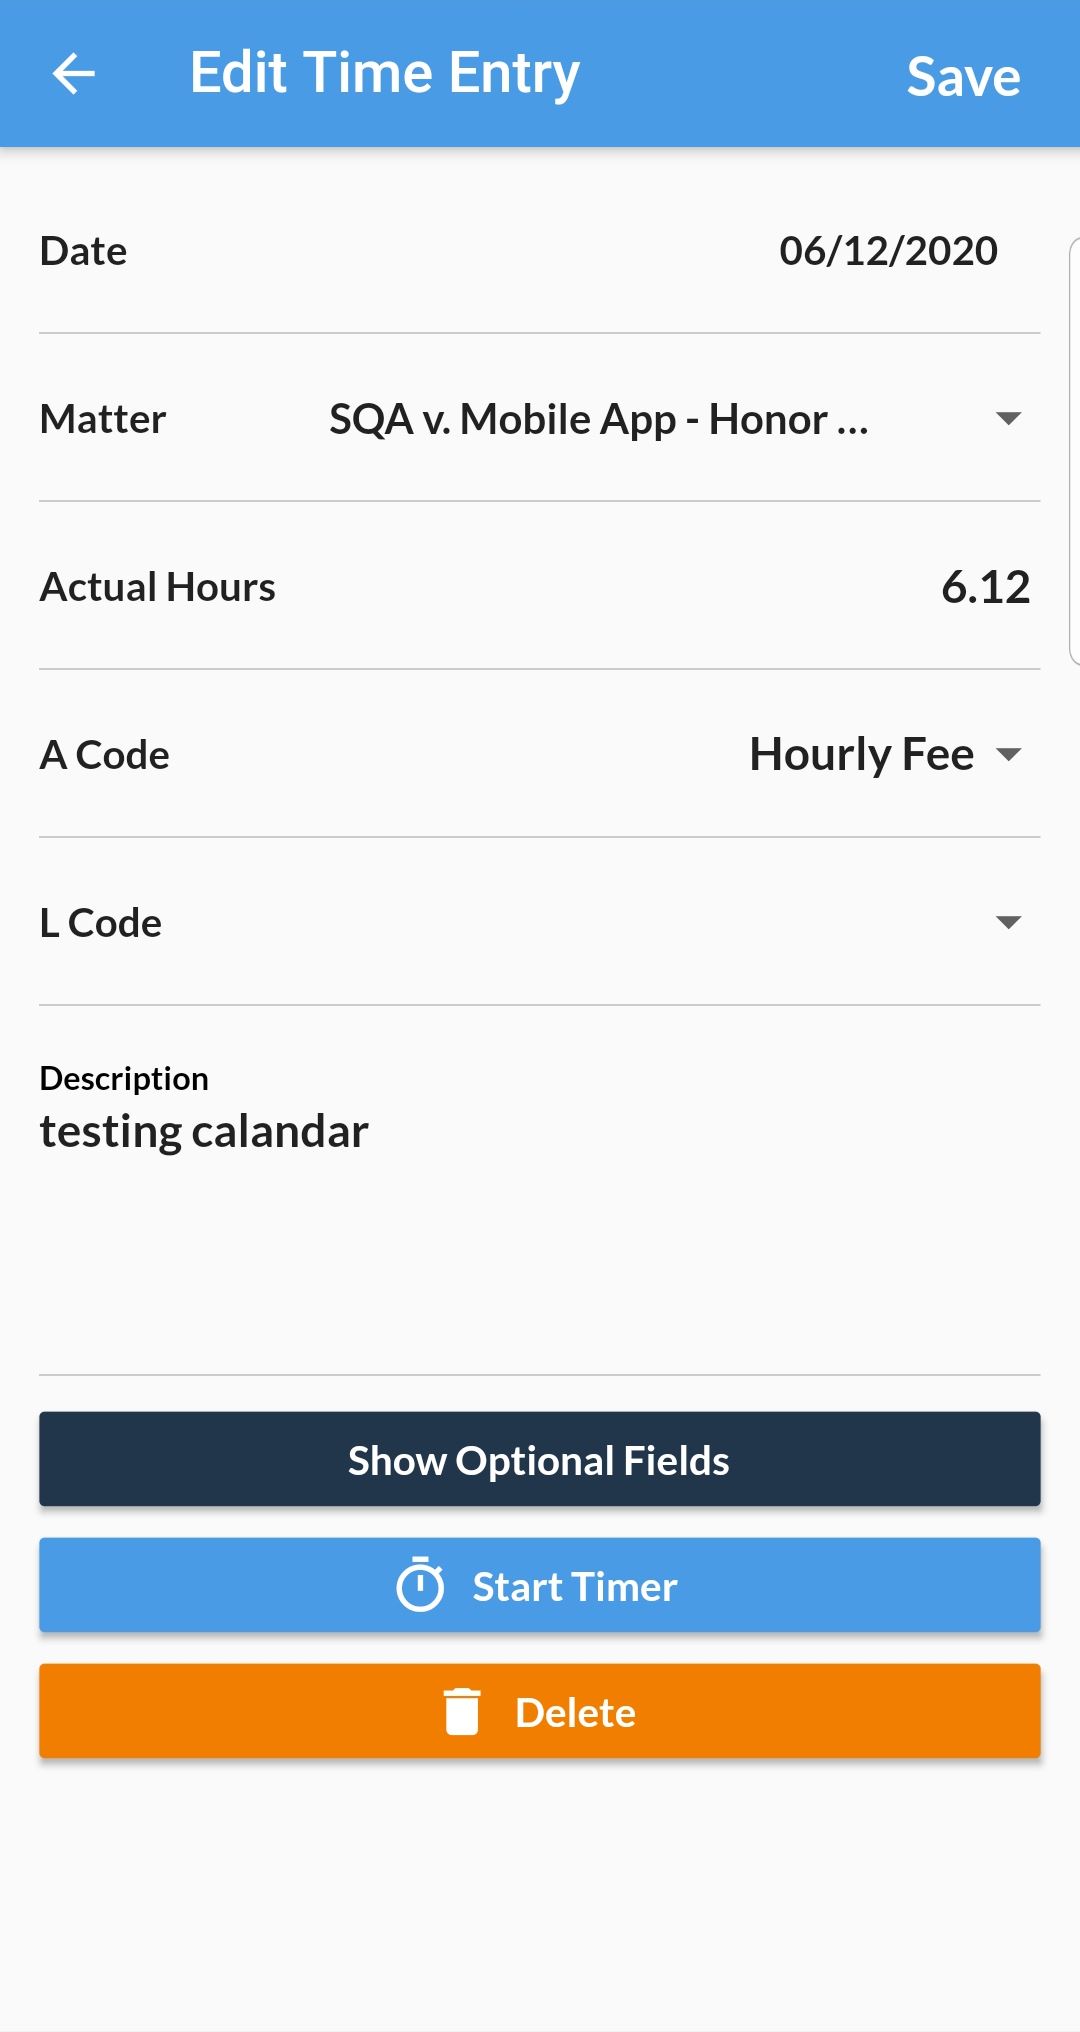
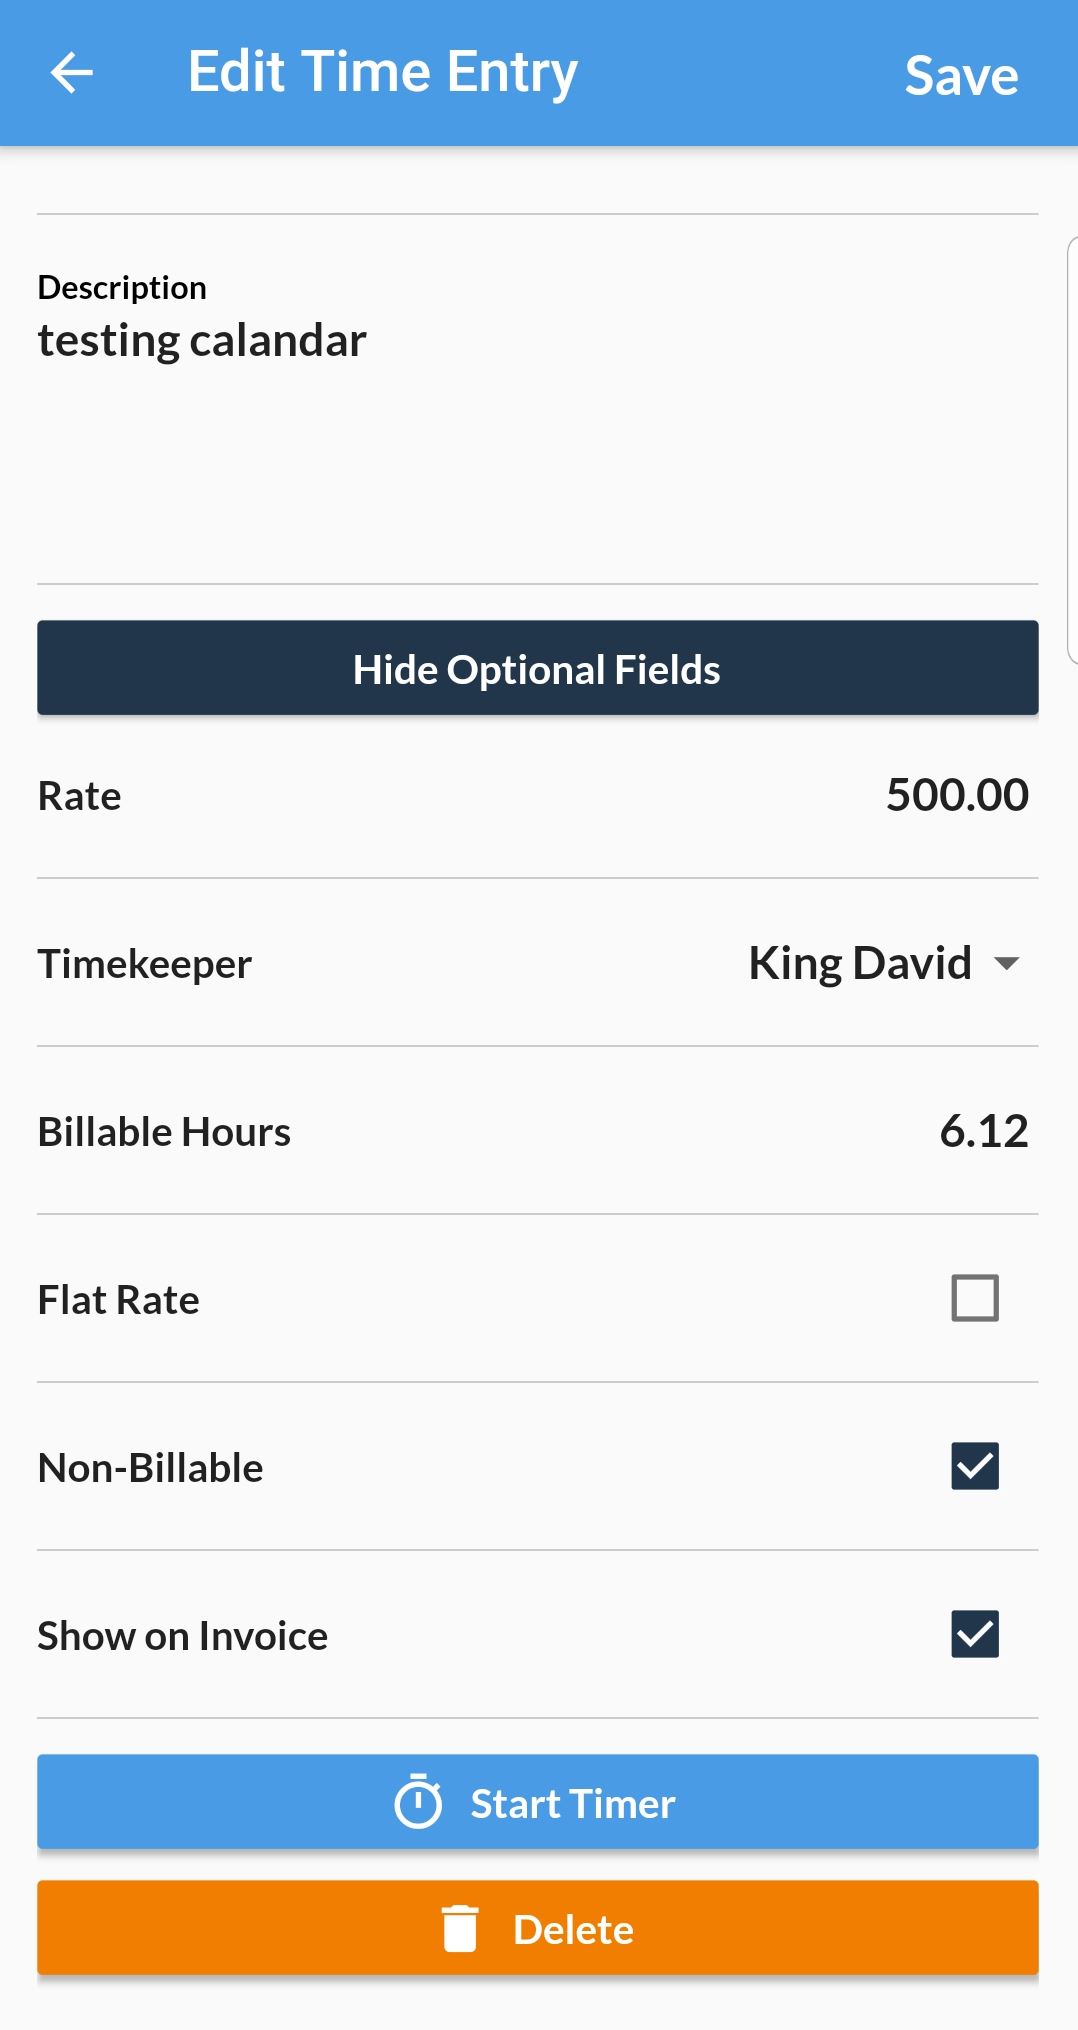
Press the plus button on the bottom right and select Time Entry to open a new time entry. The entry will default to the date selected. The Matter, Actual Hours, Billing Code(s), and description can all be set. If additional information is needed, tap on “Show Optional Fields” to see the Rate, Timekeeper, Billable Hours, and to mark the entry as Flat Rate, Non-Billable, and/or Hidden on the bill.
Edit and delete:
Any of the fields listed in the previous section can be changed or the Delete button can be used to delete the entry altogether. Note that if the entry has already been billed, it will not be able to be edited or deleted.
Calendar

The calendar page on the app has the same date navigation as the timekeeping page but instead of seeing time entries, the selected day is broken out in hours with appointments and tasks on it. All-day events are displayed at the top of the day just like the web calendar.
On the main view, the space between the hours can be increased by placing two fingers on the screen and moving them apart or decreased to see the day at a glance by placing two fingers on the screen and moving them together.
There is also a list view of appointments and tasks. This can be accessed through the arrow in the top right corner of the screen, which will display all activities in time order so that all the day's events will show without spacing for the time of day.

There is also a filter for the calendar, allowing the user to view all user's activities or just theirs, and to show appointments, tasks, or both.

Activity Record Details:
New appointments and tasks can be added to the calendar from the app, as well as updating existing activities. Use the plus button in the bottom right of the screen to add an activity, press on an activity in the calendar to view it, then press the pencil icon on the top right of activity to edit it. If the icon isn't visible, then either the user doesn't have permission to edit that activity, or the activity is recurring; it is not possible to create or edit a recurring activity in the mobile app.

Access to Records
The Centerbase Mobile app allows access to many of the common record types such as Matters and Contacts. These records can be viewed and customized, but new records, other than time entries, appointments, and tasks, cannot be entered through the app.

Add on Features
Secure Chat and Automated Time Capture are add-on features to the base Centerbase product. To have them turned on please contact your Centerbase sales rep to start the process of activating and using these powerful features.
For more information about Secure Chat and Automated Time Capture on the web see this article: Secure Chat/Automated Time Capture
Secure Chat
Centerbase Secure chat gives the ability to text with clients and keep a record of those conversations in Centerbase. Secure chat can be used from the web or from the Centerbase mobile app.
Start a new secure chat by going to the client to be contacted and press the middle text button on the top row (see below). A prompt will appear to select the number to text, and the matter to link the chat to before being brought to a fresh chat page. When the text is sent, Centerbase will send from one of the phone numbers set up in the system for a secure chat. The client can text back and it will be kept both here in the mobile and also on the matter on the web. Attempting to make a new chat for a client/matter that already has an open chat, will open the existing chat rather than opening a new one.

Access to existing chats can be accessed by going to the Secure Chat Page on the Centerbase mobile app. Select one from the list to enter that chat and view the history and send a new text. A filter button is also available on the top right which allows for searching for a chat or limiting the list to only the current user's chats.

Automated Time Capture
Automated Time Capture will automatically save a billable event when calling, texting, or emailing a contact from the mobile app. When accessing a client on the Centerbase mobile app, there are three buttons at the top. The one on the left will call the client, starting a timer automatically when the call starts and stoping the timer when it ends, so the time is accurately logged for the length of the call. The middle button will start a secure chat, as described above, while the right button will email the client.
In all three cases, Centerbase will create a "Billable Event" which is a record type-specific to Automated Time Capture.
Billable Events
A billable event is like a pre-time entry. When they are logged, they contain details like matter, billable hours, and description, which can be used to make into a time entry. Since not every call, text, or email is billable, the user can control what gets added as a time entry. Generally, billable events will be managed and turned in to time entries in the Centerbase website, but the option is also available to view and manage from the Billable Events page in the mobile app.
For more information about Billable Events on the web see this article: Billable Events Dashboard
Related Articles
Secure Chat/Automated Time Capture
Mobile Set-up and Settings (old version only)
Comments
0 comments
Please sign in to leave a comment.